Friday 31 July 2009

Cherry Plum Cake

One of the nice things about being quite into the blogosphere is that I often see recipes blossom out from one blog into another, and then another, each making slight changes that that blogger likes or dislikes. This is also the case that I'll see a recipe that includes dairy or eggs, and within a few days someone has veganised it. This was very much the case with the Plum Kuchen that appeared recently in Gourmet Magazine . It then appeared in a number of blogs I follow, including Smitten Kitchen and Vegan Yum Yum.

This seemed very fortuitous as the local cherry plum tree is going cropping very well this year, and I feel it my civic duty to eat some of the bounty. I've never seen any one else picking them off the tree. The photo below was taken in a large frying pan, about 30cm across, and I ended up using less than half the plums. The rest are now sitting in the freezer ready to do something else with. Any suggestions as to what that 'something else' might be would be greatly appreciated.


I followed the Vegan Yum Yum directions, only changing one or two things, which was using Allergy Care egg replacer instead of Ener-G Egg Replacer, and replacing the half cup of Earths Balance with 1/4 cup of Pure Dairy Free, and 1/4 cup of Apple Sauce. This reduced the fat a little, but it baked very well.


Caution, you won't be able to tell from the picture, but this makes a lot. I cut it into 12ths, because I'm trying to feed up my husband at the moment, but even at 16ths this would have given nice big chunks. It is also sinfully good when served warm, which I'm sure would be considered a sin in itself, but if its microwaved for just 30 seconds, it is very much like a sponge pudding. As it's cold today, I treated myself to this as my mid morning snack.


Speaking of the internet, and how it changes what I eat, I'm quite often to be found wandering about on The 'Vegan Forum' these days. There are quite a few UK people there, which is very nice, as we discuss a lot of UK products, and special offered in supermarkets.

A week or so back one of the other members offered a soy milk maker for free, just for the P&P. Being impoverished as I am, and somewhat obsessive over the idea of getting a soymilk maker for some time, I quickly bit his hand off. It turned up on Friday, and I made my first batch of milk later that day. It's very nice, easy to use and makes a litre of soy milk from just 55g of soy beans. This is about 9p per litre, a lot cheaper than the 60p tetra packs from Tesco, and a lot greener too. Plus, I have loads of Okara (soy bean pulp) to use as well, which I'm gathering up for recipes all ready.

Its a little effort to clean, but not too bad really, and considering I normally manage to cause things to boil over if I try making the soy milk on the stove, so really I'm just cleaning a mik maker, instead of a stove. Plus it seems to need a lot less soy then the stove recipes I've encountered. I'm not really sure why this is, but it doesn't seem very thin or anything, so that's another advantage.

Best of all, it seems like the company that makes it have discontinued the make I've got, and now do a fancy electronic one, which by all accounts is no where near as reliable or good. Also, I've become very chatty with the person who sent me the milk maker, so I'm very happy about that too.

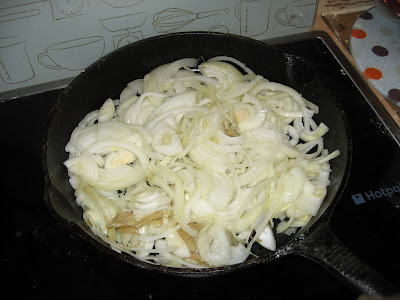
Not much in the way of inventive cookery these last few days, so behold a bit of random food pictures.

Broccoli, Chilli and Courgette Stirfry.


Sushi


The beetroot in the sushi was grown by my Dad.

Chilli Beans with Cider Bread


In yet more exciting news, my Brother's fiancée has just started a food blog. It's an omni blog, but a few nice vegan or veganizable recipes are already on there. Its nice to have a shared interest with someone. 'Misty' is a very lovely woman, and really kindly when I first turned vegan offered to buy my a Carob Easter Egg... isn't that sweet of her? She's also a scientist by trade. Isn't it interesting the way people think that science and spirituality are opposing forces. Surely, a curiosity about how the world works doesn't need to be limited to the 'nuts and bolts' of things.
http://mistywood-foodforthesoul.blogspot.com/

Anyway, I sure think it would be nice to welcome her into the blogosphere.

Tuesday 28 July 2009

Garden Soup and Treacle Tarts


Yesterdays dinner was a modified Garden Vegetable Borscht soup from How it all Vegan, followed up with a slice of treacle tart. Isn't the soup a pretty red? I modified this by swapping the cabbage for kale, and the spinach for Swiss chard. I topped this with a little soy kefer. It made loads, so I've frozen some down, and ate the rest with some lentils stirred in for dinner this evening.

The treacle tart from last night didn't quite work, but I decided I to have a go at making my own single serve microwave treacle tart. Stick with me on this, as I serve between weighed measurements and volume measurements. Sorry about that ;)

Single Serve Pie Bases - For two

20g Rolled Oats
10g Dry sweetener of choice
5g margarine or apple sauce
small pinch of cinnamon

Mix together and press into microwaveable pie dish or ramekin. Try to leave an indentation for the treacle to go into. Microwave for 1 min on high. You could also bake for 10 mins at 180°C.

Treacle Tart Topping - For two

2-3 Tablespoons of dry breadcrumbs (or 4 of fresh)
2-3 Tablespoons of golden syrup
1/8 lemon essence

Mix all ingredients and spoon onto the top of the prepared base. Press down and microwave for 1 min. If it looks like it needs a bit longer, microwave for 10 second increments. You could also bake for 10-15 mins as above.


Verdict - Very tasty, but needs work. A bit too much topping for the base. I'll play to see what I can do. I expect if I had baked it in the metal dishes it would have worked really well as the main issue was it sticking to the bottom.

Monday 27 July 2009

Broccoli Skillet Toss


I go through small phases of really longing for certain veg. This week, I've not been able to get enough broccoli.

Saturday Night it was Broccoli and Chili Pasta, which I've posted about before and today I had a snack bowl of broccoli stir fry.

Broccoli Skillet Toss - Serves 1

1/2 head Broccoli.
1 clove garlic
2 rings red onion
2 small slices of fresh ginger
1/2 tsp chili paste
1 tsp oil of choice
  • Cut broccoli into florets. Slice garlic as thinly as you can and matchstick the ginger.
  • Heat your 1/2 tsp oil in a cast iron skillet to a medium heat
  • Add garlic, onion and ginger and cook until starting to go translucent
  • Add broccoli and cook, stirring frequently for 2-3 mins
  • Mix remaining oil with chili paste and drizzle into pan
  • Cook for another 2-3 mins. If you have a lid big enough, place this over your broccoli to help it cook and keep the moisture in.
  • Eat. Chopsticks optional.
I also had an epic food purchasing fail. Being as I love peanut butter I was very excited to see some cheap in QD (budget shop in my town). It turns out when a jar of peanut butter with chocolate chips in it is for sale and cheap, it's because it seems to contain no chocolate chips, just sugar.

Now, sugary peanut butter might be okay to ice a cake with, but it's not so nice on toast. Queue the quickest peanut butter improve know to man.

Chocolate Peanut Swirl

1 small jar peanut butter
4 squares (c 20g) dark chocolate
  • Chop chocolate into chip sized lumps
  • Microwave jar of peanut butter for 1 min. It should now be runny enough so you can't dig a hole in it
  • Add chocolate chips and stir just long enough to incorporate the chips, but stop before the chocolate fully melts
  • Place jar in fridge to harden
Actually, this saved the jar of peanut butter. I wouldn't go as far as buying peanut butter to do this to... but if you have one of those inexplicably sweet jars, go for it. It came out like a very budget version of 'Dark Chocolate Dreams' though not nearly as nice. Admittedly though, it was less than 1/4 of the price. I expect if I added more chocolate it would work better, but I fear that I would be throwing good money after bad.

Also, I've had a bash as coconut milk kefir. Basically, I took about 1 cup of coconut milk and added 1 tbs of soy kefir. I let then rest overnight on the counter top. It had separated out into especially sour 'whey' which has gone to make sourdough, and white creamy stuff. After straining, there was about a 1/4 cup of coconut cream kefir. I wouldn't bother again.

Friday 24 July 2009

Pandemonium - A Cast Iron Excuse

Unfortunately, I'm not able to bring you pictures of scrummy foods today. I've been cooking, but mostly following recipes, and I don't like to blog if I can't bring you something interesting or new.

What I can bring you, however, is pictures of my new (to me) cast iron pans. Looking at the makers seal on the bottom (Victor) I don't think they are anything special, but I still love them already.


These came from a charity shop, and cost the princely sum of £7 for all three. The two smallest are currently in the oven, being reseasoned.

How do you season a cast iron pan I here you cry? Well, it's most easy.
  1. Should your pan require cleaning, you can rub it with a iron pan scrubber with a little salt and oil. Wash this very thoroughly as salt causes rust. If you have an oven with a self cleaning option, you can place your pan into the oven and run the self clean cycle. Personally, I've never tried this before, so I can't recommend this.
  2. Cover you pan inside and out in some kind of lipid. Some people claim vegetable oil makes the pans sticky. This isn't my experience. Personally, as a vegan I don't make shed loads of options here, so a I've tried coconut oil, rapeseed (canola) oil and olive oil. Rapeseed was best.
  3. Preheat your oven to 180°C.
  4. Place turn your pan upside down and place on a baking sheet. If you can, open some windows as there will be smoke.
  5. Place pan in oven and heat for about 1 hour. This bonds the oil to the pan, and makes it almost non stick once cool.
  6. Leave pan in oven until cold.
Some people recommend doing this once a month, but if you use your pan fairly regularly, I don't think it's required. Never put your cast iron away wet, and you'll probably be fine.

Why do I cook in cast iron I here you cry with some excitement. Well, let me tell you.
  • Cast iron is almost non-stick. I don't use non stick pans because. I have concerns about the toxicity/carcinogenic properties of the non-stick coating of pans. Considering it's well known that the fumes from non-stick pans can kill pet birds, I find myself ill at ease eating foods cooked in them.
  • Clean up is very easy. Many people advocate just wiping out your pan with kitchen towel or a clean rag. Unless I'm cooking something that leaves behind a lot of residue, this is what I do. Much quicker then washing up in the sink. If it requires a proper clean, I use use plain water and then heat gently on the stove afterwards to dry it.
  • Lifespan - Stainless steel and aluminium pans require replacing every few years, yes, even expensive ones warp. A good cast iron pan will literally last you a lifetime. This is why you see perfectly usable pans with a makers mark from the turn of the last century regularly appearing on ebay
  • Cast iron increases the amount of dietary iron. As a vegan, this is a very fortunate thing. Acidic foods such as tomatoes will increase the leaching into your food. Its up to you if you think you need this though. Sometimes tomato based foods are a little darker when cooked in cast iron.
  • Cast iron can go from hob top to oven. Mind the hot handle though!
  • Cast iron has very few hot spots, especially better quality pans.
  • Cast iron is very good for browning food. This is wonderful for things like caramelised onions or pan fried seitan.
  • Cast iron works very well on induction hobs. Induction is a very efficient method of cooking, which is about 90% in terms of heat transfer. However, this requires pans to be ferrous to work, and many cheap pans aren't. Cast iron always is.
  • Cast iron is blurry heavy, and give your wrists a darn good work out ;)
The main concerns when using cast iron are
  • It requires a little bit of maintenance. This is normally nothing more then cleaning with a damp rag and then heating until dry. If it gets very gunky you might need to scrub and reseason, but this has only happened to me once in six months.
  • They are very, very heavy. If you have weak wrists this can be a problem. My wrists have become noticeably stronger since I started using cast iron.
  • Some ceramic/halogen glass topped hobs advise against the use of cast iron incase you scratch the surface or the weight shatters it. I find a strong policy of 'not dropping the pan' seems to have worked wonders here.
  • It is possible to get too much iron. Personally I'm not in the least worried by this due to my vegan ways.
I now have, including today's pan. 1 small skillet, 1 medium skillet, 2 large skillets and 1 cast iron griddle.

If you have a hob top suitable, you really should think about getting at least one cast iron pan. Check out your local charity or thrift store, or keep an eye out if you have a TJ/TKMaxx near you, which often has these in store.

Monday 20 July 2009

Playdough Pizza and Super Sushi

No, not real playdough, that wouldn't taste so great, but incredibly green looking dough.

I used my normal pizza dough (200g flour, 1 tbs oil, 1 tsp easy bake yeast, 1/2 tsp salt) and added 1/2 a tsp of spirulina. I did this for three reasons 1) I have a lots of the stuff left over from my short stint of attempting to eat raw 2) It's a vegan superfood, apparently 3) Poops and giggles!

My spirulina in mushrooms experiment of earlier on in the week yielded very fishy smelling mushrooms, which made me decide to only add 1/2 tsp this time. I expected a slight green tinge, but what I got was awesome playdough green. You can see this here, where I have rolled out and added some Tofutti Chedder Style Slices in a misguided attempt to make a double decker pizza.


This doesn't really show up exactly how green the dough was... by the time it had rested in the fridge, it was even greener.

After topping with tomatoes, jalapeño peppers, home grown courgettes, mushrooms and peppers and baking, it pretty mush turned a slightly green grey. However, the fishy taste I had detected in the mushrooms was all but gone, so I think this will become a regular nutritional boost to my pizza doughs.


Saturday night I made my first ever sushi.

This was made with rice dressed in maple syrup, cider vinegar and homemade Gomashio, rolled with a mix of courgettes, cucumber, yellow pepper and beetroot. I thought it would be a lot harder to make


The next day I enjoyed the left over veggies mixed with some rice. This made a lovely pink rice salad. I love the way beetroot dyes everything pink. I'm sure there must be some cool pink recipes I can utilise this in. Suggestions welcome :)


In non-food related news, my trip to 'Aylesbury on Sea' was an incredibly damp one. Note the reflected life ring on the pier. It's kinda a shame, as if it was sunny, it would have been a great day.


It pelted it down, and I spent longer then strictly required hiding in Costa, lingering over a soya latte.

Friday 17 July 2009

Cherry Baby - I'm gonna make you mine


Good old Frankie Valli huh? Okay, I know it's Sherry Baby, but never mind huh?

Anyway, in the continuing thread of cherry related posts, I submit, for your consumption, Cherry Schapps/Vodka

Take some cherries, and half fill sterile bottle with them. If the bottle already contained vodka, it'll be sterile anyway, or you can use any of the methods such as boiling, that are already on the interwebs.
Add 1 tbs of sugar. This step is optional, but really helps to draw out the juice from the cherries
Shake daily.
It is ready after 1 month, but gets better with time.
You can, if you so wish, remove the cherries and top up with a little more vodka after about 2 weeks, but personally, I'm going to leave them in, so I can have a nice taste of summer when I finally cave and drink the vodka... in about August ;)

If you are feeling really frugal, when you remove the cherries, you have repeat the steps above with sherry to make sherry cherry. Don't add the sugar, I'm told it's nasty.

Thursday 16 July 2009

Roasted Pasta and Aubergine Bake

Thursday is always the day I use up left overs in the fridge, as Friday is shopping day. I had the following left overs

'Cheesy' Fondue
Mushrooms
Whole Aubergine

Queue a Pasta Bake!

Roasted Pasta and Aubergine Bake (Serves Two)


150-200g Pasta
100g Mushrooms (about half a pack)
1 Aubergine
1 400g can chopped tomatoes
Fresh (1 tbs) or Dried 1 tsp dried Basil
Either 1/4 - 1/2 cup vegan cheese grated or 1/4 - 1/2 cup cheese sauce/fondue

  • Slice aubergine and either grill or pan fry with a smidge of olive oil until softened*
  • Cook pasta till just soft in plenty of salted water
  • Drain pasta and add back into pan
  • Add tomatoes, mushrooms and basil. Bring up to a low simmer to soften mushrooms very slightly.
  • Assemble pasta bake in medium sized oven safe dish as follows, 1/3 Pasta mix, half aubergine, 1/3 pasta, remaining aubergine, cheese, pasta. Visual text diagram at the end of the instructions
  • Bake for 15-20 mins at 200C/390F. If it browns too early, cover with foil
Pasta (1/3)
Cheese/fondue
Aubergine (1/2)
Pasta (1/3)
Aubergine (1/2)
Pasta (1/3)

Verdict: Very nice. Next time I might put some breadcrumbs on the top, mixed in with soy cheese for a little added crunch. Throw in whatever veggies you have to hand.

*I used a griddle for the funky char marks

Other Eats

Breakfast was very dull. Cornflakes and soy milk

Morning Snack - Mushrooms, sautéed with a little tomato/chilli dipping sauce and some spirulina added for the trace minerals, served on toast. This had a very odd taste. I shan't be trying it with mushrooms again!


I also made some Cherry Schnapps (American Style) but more on this in tomorrows post

In the evening I made some avocado mouse. I would post this, but it always looks like a big poop in photos, so I won't.

Tuesday 14 July 2009

Carrot Cake for Breakfast - In Pancake Form!

Pancakes are a big favourite of mine at the weekends. During the week we don't really have the time to eat them before my Husband goes off to work, but we enjoy standing together in the kitchen on a Sunday morning, chatting away and eating the pancakes hot out of the pan, while the others cook.

I'm a big fan of Chocolate Covered Katie, and when she posted a Pancake Challenge, it was about all I could do to stop at the two pancakes in three days mark, so, without further ado, I present you, Carrot Cake Pancakes with Creamy Soya Cheese Topping.

Carrot Cake Pancakes - Serves 2 or more


1/2 scant cup flour
1/2 cup rolled oats
1/2 tsp cinnomon
1 1/2 tsp baking powder
large pinch salt

1 cup non-dairy milk
1 carrot medium grated
2-4 tbs currants or raisins

Mix together dry ingredients, then add wet ingredients and fruit, and mix lightly.
Heat a non-stick pan or skillet over a medium heat, oil very lightly
Use a 1/3 cup measure for each pancake, You may find the batter does not spread out without encouragement from the back of a spoon.
Cook until firm in the middle, and flip and cook until golden brown under. This normally takes me two minutes each side.

Serve with syrup or cream cheese topping

Easy Creamy Cheese Pancake Topping

2 tbs vegan cream cheese - I used Pure Dairy Free Soya Soft & Creamy Spread
1/2 tsp maple syrup
1/8 tsp lemon extract
1/8 tsp vanilla extract
1/8 tsp cinnamon

Place in a small bowl and mix together. To get a more runny consistancy, surround the small bowl with just boiled water. This is much nicer made the night before. I mainly made this to use up the left over Pure Dairy Free Soya Soft & Creamy Spread , which was hideously sweet and not at all nice as an actual cheese replacement.

Monday 13 July 2009

Fondue Fun


Not much to say here, other than look at the pretty Le Creuset Fondue pot I bought a few weeks back for £5 from a charity shop.

It looks like they have updated the model they are selling online now. I like mine more.

It's full of yummy fondue from The Vegan Lunchbox. I honestly wasn't expecting to like this the first time I made it... it was really justifying the purchase of the pot, but it's gooooorgeous and so healthy! The main ingredients being tofu, carrots, nutritional yeast and miso, it's pretty much like a gooey, yummy vitamin pill which you dunk things into. It was blurry lovely :)

Saturday 11 July 2009

Cherry Bakewell Pancakes

Ever since I noticed a few weeks back that the wild cherries at the edge of my estate were, indeed, edible, I've been looking for a way of eating them up. At the same time, ever since becomeing a vegan, I've been Jonesing for Bakewell Tarts. Well, can you see a thought forming?

Along came Chocolate Covered Katie with her Pancake-Making Bonanza and all my problems are solved. Okay, not all of them, but the cherry related ones are :)

Behold, if you will, the Bakewell Pancake.


Recipe - Makes two big portions, about 6 -7 smallish pancakes

1 Cup White Flour
1 tsp Baking Powder
1 tbs sugar

1 1/4 cup non dairy milk (I used unsweetened soya)
1 tbs sunflower oil
1/2 tsp almond extract
1/2 tsp vanilla extract

1/2 cup cherries - quartered
1/4 cup almond flakes

In a large bowl mix together the first set of dry ingredients, then add the wet and briefly mix, before finally adding in the chopped fruit and almond flakes and stirring until combined. As always with vegan baking, don't over mix.

I cooked this over a medium high heat, portioning out in 1/4 cup measures, which were a bit too small if truth be told. The pancakes need flipping once they are fairly solid in the middle, which was about after two minutes.

This was perfect served with my adapted Cherry Compot, topped with toasted flaked almonds. My husband pronounced them 'Very Bakewelly' He was quite happy to go cherry picking the next day, which I think is an indication of the success here ;)

Friday 10 July 2009

Simple Cherry Compot

I made this partly to preserve my epic haul of wild picked cherries, and partly as a pancake sauce to go on my Bakewell Pancakes, inspired by Chocolate Covered Katie's Pancake-Making Bonanza.

This was adapted from Sweet and Sassy Cherry Sauce over on dlife, a diabetes support website, who in turn took it from The Cherry Marketing Institute . Like cherries need marketing?!?

Adapted Cherry Compot - Makes two cups

2 cup Cherries
2 tbs sugar
6 tbs water (Divided)
2 tbs cornflour
1/8 tsp salt
2 tbsp vodka
Juice and rind of 1/2 a small unwaxed lemon

  • Place cherries sugar and 4tbs of the water into a small pan and bring to a slow boil, simmer covered for 6 minutes, stirring occasionally
  • Once the cherries have released a lot of the juice, scoop them out with a slotted spoon and put to one side
  • Mix the salt and cornflower together. Add this to your 2tbs of water, and mix into the pan
  • Add the vodka along with the lemon juice and zest.
  • Continue to simmer over a low heat for 7-8 mins
  • Put the cherries back in, and cook for another 3-5 mins, until cherries are softened and the compot is of the desired thickness.
Kept in a sterilised jar in the fridge, this will last for up two two weeks.

To make into a pancake syrup, take 2 parts compot to one part maple syrup and warm.

Thursday 9 July 2009

Soup 'Erb

I won't apologise for this. I love soup. I love how easy it is to cook, how great it tastes, how many different sorts there are, and how frugally you can use up veggies that have, frankly, seen better days by this point in their existence.

So, this rambling warning delivered, I have two soupy days to tell you about. First, Black Bean Soup adapted from La Dolce Vegan. This used up the left over black beans from the 1lb sack I cooked over the weekend. It should have had an avocado salsa with it, but this didn't happen... because I didn't have an avocado. Instead it enjoyed a hastily knocked together salsa of fresh tomato, spring onion and parsley.


I also made some rather tasty foccachia, using the same recipe as the Pizza Dough. I let this go through the dough cycle, then took away 1/4 of the dough, and added a handful of chopped home dried tomatoes, some chopped green olives, and a little bit of mixed herbs.


I used the left over 1/4 of the dough to make two cinnamon rolls, but this was an epic fail :( I don't think the dough was sweet or oily enough.

Anyway, baked for about 20 mins in a very hot oven, the rolls were okay, but not worth making again.


As I was in a pottering about the kitchen mood I also made some caramelised onions, based on the method as detailed over on Tea and Cookies. I'm always shocked how much they condense down
From Ready, Veggie, Cook


Today I also made a recipe from LDV, this time ginger butternut squash soup. This was because I was feeling a littel guilt that I've had a squash sat up the in spare room for longer than I care to admit. These suckers don't die do they?

I thought some nice toasted butternut squash seeds would be a nice addition so the soup. They were ever so simple to make, just cleaning the seeds, and toasting in a dry pan for 2-3 minutes. Entertainly, they popped out of the pan just like popcorn! To these I added a little homemade
Gomashio, which added a lovely taste.

Cooked Seeds


Soup


I'm thinking about entering Chocolate-Covered Katie's interesting sounding Dessert Pancake-Making Bonanza. I don't know though, as I am still wondering about, finding my feet in both cooking and the blogosphere. Still, I guess the first step towards failing is not trying, huh? Lets see what happens!

In not-directly-related-to-cooking news, the garlic clove I planted months ago in the broken whistling kettle is now yawning above ground. I don't expect he'll be any good, but at least I feel that something happened from my planting him.


Monday 6 July 2009

Pizza my mind?

Due to the rampant heatwave here in the UK, I've not really fancied having the oven on for the past few weeks, but today my pizza lust got too much for me.

My normal pizza dough creates enough for two

125ml (1/2 cup) water
200g (1 1/2 cup) plain flour
1 tsp yeast
1 tsp salt
1 tsp olive oil

I dump all this in the breadmaker, in this order. Indent the top of the flour and add the yeast, and put the salt and oil in the corners of the bread pan. Stick this on dough, and you are good to go.

Since it's well documented that I'm unable to leave things be, I decided to throw in some flavour to the base.

1 small handful dried mushrooms
1 small handful dried tomatoes

I just threw these in a food processor, then whizzed them to crumbs, and plopped these onto of the flour. It dawned on me after, I should probably have soaked them. Meh.

Added to this
1/2 tsp dried herbs
1 pinch chilli flakes

Waiting to be processed in the breadmaker


After 90 mins in the breadmaker


I rolled the dough out, and then let it prove for about 30 mins, untill puffy and yum :)


Now, to top the pizza I had left over chilli, mushrooms, yellow peppers and button mushrooms.


I tend to blind bake pizzas as I don't like a soggy crust. For me, I just fork the base slightly, cook for 2-3 mins on one side, flip, cook for 2-3 min the other side, and then add your toppings. With thicker based, this seems to prevent it getting unpleasantly moist. I bake at 230C for 10-15 mins, and then add 'cheese' and stick under the grill again.

I also added a little toffuti cheese slices, as my husband really loves these.

Doesn't it look nice all baked up?


Also, I normally make up a little sauce to dip the pizza crusts into. Today's was a little garlic and chili sauce dipping sauce, which I added some ketchup, a little brown sauce, and then some liquid smoke. Basically, anything liquid that's in my kitchen and not nailed down ;)

I also picked some cherries from the tree by the edge of the estate, with the intention of putting them through the dehydrator, as I love dried cherries, but I'm not prepared to shell out for them. Lovely husband pitted them by hand for me :)

Sunday 5 July 2009

Modified Kale Pasta Eats

Firstly, Hello to anyone coming over from the link on For those of you who don't know what Operation Beautiful is, please visit the site. The primary aim is to tackle 'Fat Talk' by sharing positive notes in public spaces. It goes further than this though, and in my opinion, empowers all through the acceptance that appearance is subjective, and we are all beautiful.

Now, onto the eats!

Since first trying 'Matthew's Spicy Tomato Peanut and Kale Pasta' recipe from The Dolce Vegan, I've eaten it regularly, possibly around once a week. This is for three reasons

1) Its a very good way of eating my greens that even my Husband likes
2) I'm overwhelmed with Kale, grown in a container in my front garden
3) It's very, very tasty!

However, the original recipe calls for tomato juice, which we don't often have in the house. The recipe calls for a can of tomato juice, of a size I've never seen in the UK. This meant buying a carton and freezing the left overs, which never works.

Necessity being the mother of invention, I've tweaked the recipe a lot to make it more of a 'store cupboard + Kale' type of thing.

Adapted Kale & Tomato Pasta - Serve 2


Pasta for Two (150g)
Bunch of Kale, Chopped (About 2 big handfuls)
Can of Chopped Tomatoes
1 Tbs Tomato Purée

2 Tbs Peanut Butter
1/2 Tsp Garlic Purée
1/2 Tsp Hot Pepper Sauce (Tabasco is fine)

1) Cook the pasta
2) While the pasta is cooking, put the chopped kale, tomatoes and purée in a small pan. Bring almost to a boil, reduce heat and simmer gently for 8 minutes
3) After 8 mins, add the peanut butter, garlic and hot pepper sauce, stir
4) Leave another 2 mins, drain the pasta and mix it into the tomato mixture

Finn!

Don't be tempted to skip the tomato purée, this really thickens up the sauce and gives it a tomato tang which is otherwise missing.